The main reason why your Starlink is saying that it is not vertical is because it has been moved while it was still powered on. Whenever you move your Starlink Dish you should power it off before you move it, this can prevent that message from appearing.
Your Starlink Dish could have been moved for a few reasons, either you have moved it yourself, or a gust of wind could have blown it to the side. There is a way that you can solve this issue without having to hire a professional.
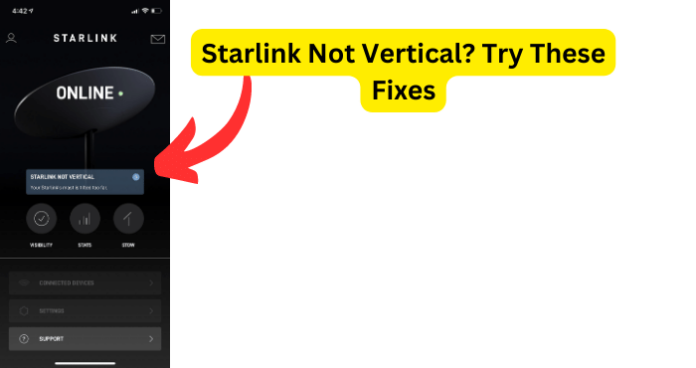
If your Starlink Dish has not been moved and you are still seeing the warning saying that your Starlink is not vertical there are a few things that you can try to clear this message.
Why Does Starlink Say Not Vertical?
1. Starlink Dish Moved While On/Connected
As stated above when you see the warning saying that your Starlink is not vertical the most common reason behind this, is that your Starlink Dish was moved while still powered on.
Since there is limited information about this issue this is what other users are saying is what caused this warning to appear. How can your Starlink Dish be moved?
If you have not moved your Starlink Dish yourself it could have been moved by a strong gust of wind. Whatever the reason behind how your Starlink Dish was moved there is an easy solution you can try to fix this issue.
Fix – Stow Your Starlink Dish
If you are seeing a warning that your Starlink Dish is not vertical and your dish has been moved while powered on the first thing you should do is Stow your Starlink Dish. There are three ways you can Stow your Starlink Dish.
Stowing your Starlink Dish allows you to move the dish back to its default orientation. Below I will be going over the three different ways you can Stow your Starlink Dish.
Using Starlink App
- On your mobile device open your Starlink app.
- Tap on the Settings
- Scroll down until you see the Stow Starlink option.
- You will see a toggle, slide the toggle to the right.
- If you are directly connected to your Starlink this will Stow your Dish.
- If you are connected via mobile device data or another network there will be an additional confirmation. Tap on Okay to confirm the Stow.
Note, you will not be able to un-stow your Starlink Dish while you are on your mobile data or another network. Keep in mind while you are stowing your Starlink Dish you will not have access to the Starlink internet, though your network will remain on.
Not Using Starlink App
- Go to your Starlink Dish.
- With your Starlink Dish turned on and plugged in, remove it from the mounting base.
- Place your Dish face down on a flat surface.
- Wait for about a minute, your dish will automatically tilt into the Stow potion.
- The moment this happens unplug your dish, the router cable, or the Starlink cable.
- This will keep your Dish in the Stow potion.
- To restore the service to your Starlink Dish, install the Dish back into the mount and power it back up.
Manually Stowing if Dish is Broken
- Go to your Starlink Dish.
- Remove your Starlink Dish from the mount.
- Unplug Starlink Cable from your Dish.
- Place your Starlink Dish face down on a flat service.
- Now you will slowly apply force to the mast part of your Dish, and push it down into the Stow potion.
Note, you will hear some grinding and clicking noise. Do not worry this is just the gears and electric motor being forced to move. Try not to push the mast too far and you will not break anything.
2. Starlink App is Out of Date
If the steps above did not work then the issue might not be in the Starlink Dish but with a bug/glitch inside the app. If there is a glitch in the app that can cause the warning saying that your Starlink is not vertical.
If your Starlink app is out of date there could be glitches that are present that can be causing this issue. Thankfully doing an update can clear any bugs that may be present in the app.
Fix – Update/Clear Cache on Starlink App
Check to see if your Starlink app needs an update. As stated above doing an update may clear any corrupt files that are causing the warning saying that your Starlink is not vertical. Keeping your Starlink App updated lets your app work at an optimal level.
Follow the onscreen instructions to update your Starlink app. After the update, you should also clear the cache on the app. This can also clear any glitches that may be present in the Starlink app.
3. Bug/Glitch in Starlink App
If the reason that your Starlink is giving you a warning stating that your Starlink is not vertical is due to a bug/glitch on the app and doing an update on the Starlink app did not solve the issue.
There is another thing you can try. When there is a bug/glitch in the app this could cause issues within the app and devices that are connected to it. Try uninstalling the Starlink app and reinstalling the app back onto your mobile device to see if this solves the issue.
Fix – Uninstall/Reinstall Starlink App
If the issue is with a bug/glitch within the Starlink app and doing an update and clearing the cache on the app did not do the trick. One thing you should do next is delete the app from your mobile device and reinstall the app after a few minutes.
Once you have uninstalled the Starlink app from your mobile device I would recommend you wait a few minutes to even an hour before you reinstall the Starlink app.
Other users who have experienced this issue have said that this has worked for them and the app is no longer saying that your Starlink is not vertical.
4. Issues With Starlink Connection
Are you still experiencing this issue after you have done all the steps above? There could be an issue with your router connecting to the network or to your Starlink Dish. This can cause some issues with your Starlink not working properly.
If doing all the steps above still has not helped this issue you should reboot your Starlink. This can refresh any corrupt files that may be present in your Starlink router.
Fix – Reboot Your Starlink
There are three ways that you can do a reboot on your Starlink, I will be going over all three ways you can reboot your Starlink below.
Using the Starlink App
- Go into the Starlink app.
- Tap on the Setting Options.
- Scroll until you see the Reboot Starlink toggle.
- Move the toggle to the right, this will reboot your Starlink.
- After doing the reboot, it will take a few minutes to boot back up. During this time you will see the app say that you are Disconnected.
- Check back in a few minutes, you might have to connect your device to the Starlink Network again.
Power Cycle Your Starlink Router
- To manually power cycle your Starlink router unplug the AC power cord to your router.
- Wait a few minutes before plugging the AC power cord back in.
- It will take around 15 minutes for the Starlink to come online.
Unplugging Starlink Cable
You can unplug the Starlink cable from the dish or the router, this will reboot your Starlink.
- On the dish or the router unplug the connector.
- Wait a few minutes.
- Plug it back in.
- Be careful, you do not want to damage the connector. Your Starlink DIsh will take a few minutes to connect to the satellite and move to its final potion.
5. Faulty Starlink Device
If you have tried all the steps above and you are still seeing the warning that your Starlink is not vertical it could be due to a faulty device. Even though Starlink is a reliable device, issues can happen like all devices.
There could be a chance that either your Starlink router is faulty or the Starlink Dish is faulty. There might not be anything you can do to fix this issue on your own. It is time to contact the Starlink Support team.
Fix – Contact Starlink Support
When you have tried all the steps above and you are still seeing the warning that your Starlink is not vertical it could be that your device is faulty.
Since there is not a lot of information on this issue the best thing you can do is contact the Starlink Support team to see if there is anything they can do. If your Starlink router or Starlink Dish is faulty they may have to exchange it for a new one.
With all that being said, the best thing to do when you see the warning that your Starlink is not vertical is to Stow your Starlink. If that does not work try using the other steps that I listed.
If none of that works then contact the Starlink Support team to see what they suggest you do next. As previously stated the information on this issue is limited; these are reasons and solutions that other users have done.
If this guide has helped you solve this issue, share this with your friends and family that may also be dealing with this issue.